If you have built a Django project locally and want to share it with the world, PythonAnywhere is one of the most beginner-friendly hosting platforms available for Python developers. It handles the server infrastructure for you, gives you a browser-based terminal, and has a free tier that is genuinely usable for small projects.
This guide walks through the entire deployment process, explaining not just what to do but why each step matters. I included two stumbling blocks that tripped me up the first I deployed as well: makemigrations and what to do with static files.
Prerequisites
Before starting, make sure you have:
- A working Django project that runs locally with
python manage.py runserver - Your project zipped into a single file (e.g.,
my_project.zip) - A free account at pythonanywhere.com
Step 1: Upload Your Project
Log into PythonAnywhere and go to the Files tab. Upload your zip file to your home directory, which will be located at /home/yourusername/.

Once uploaded, open a Bash console from the Dashboard (click “New console” and select Bash). Then unzip your project:
cd ~
unzip my_project.zipYou should now have a folder like /home/yourusername/my_project/ containing your manage.py and all your app directories.
Step 2: Create a Virtual Environment
A virtual environment is an isolated Python installation dedicated to your project. This matters because PythonAnywhere hosts many users on the same machine. Without isolation, installing Django for your project could conflict with packages used by other Python processes on the system.
Run the following to create one and install your dependencies:
mkvirtualenv my_project_env
pip install -r ~/my_project/requirements.txtThe mkvirtualenv command creates the environment and automatically activates it. You will see (my_project_env) prepended to your prompt when it is active. Any packages you install now go into this isolated environment, not the system Python.
If you come back later and need to reactivate it:
workon my_project_envStep 3: Run Migrations
What migrations actually do
Django uses a migration system to manage your database schema. Your Python model classes (in models.py) describe what the database should look like, but Django does not automatically read those and create tables. Instead, it relies on migration files, which are Python scripts that describe how to apply your model definitions to the database.
There are two separate commands involved:
python manage.py makemigrations reads your models.py files and generates migration files in a migrations/ folder inside each app. These files are the instructions for building the database schema. They do not touch the database themselves.
python manage.py migrate reads those migration files and actually executes them against the database, creating or modifying tables as needed.
Why migrate alone is not always enough
When you run migrate, Django applies all migration files it can find. The built-in Django apps (auth, admin, sessions, contenttypes) already ship with their migration files included in the package. Your custom apps do not, because makemigrations is the step that generates them.
This is why you can run migrate and see all the built-in migrations succeed, then still get an error like:
django.db.utils.OperationalError: no such table: notes_noteThe notes app had no migration files yet. Django had no instructions for creating its table.
When to run makemigrations on specific apps
You should run makemigrations any time you have made changes to a models.py file that have not yet been captured in a migration file. Specifically:
- When you create a new app with a model — the first time you set up an app, no migration files exist for it yet. You must run
makemigrations appnameto generate the initial one. - When you add a new field to an existing model — for example, adding a
priorityfield to aNotemodel means Django needs to add a new column to the existing table. - When you remove a field — the corresponding column needs to be dropped.
- When you change a field type — for example, changing a
CharFieldto aTextField. - When you add a new model class to an existing app — a new class means a new table.
- When you add or change relationships — such as adding a
ForeignKeyorManyToManyField.
You do not need to run makemigrations for changes that are purely logic-based (views, forms, template changes, URL patterns) because those do not affect the database schema.
The safest habit is: any time you edit models.py, always run makemigrations followed by migrate.
Running the commands on PythonAnywhere
In the Bash console, with your virtual environment active:
cd ~/my_project
python manage.py makemigrations
python manage.py migrateIf you have multiple apps and want to be explicit, you can target a specific one:
python manage.py makemigrations notes
python manage.py migrateCreating a superuser (optional)
If your project uses the Django admin panel, create an admin account now:
python manage.py createsuperuser
Step 4: Collect Static Files
What static files are
Static files are things like CSS stylesheets, JavaScript files, and images. During development, Django serves these automatically using its built-in development server. In production, however, Django is designed to hand that job off to a dedicated static file server (like nginx), which is much more efficient at delivering files than the Python application server.
PythonAnywhere follows this same production model. Django itself will not serve your static files in production. Instead, you run a command that gathers all static files from across your project into a single folder, and then you tell PythonAnywhere where that folder is.
Running the command
python manage.py collectstatic --noinputThis reads the STATIC_ROOT setting in your settings.py (which should be set to something like BASE_DIR / 'static') and copies all static files there. The --noinput flag just suppresses the confirmation prompt.
Configuring PythonAnywhere to serve them
After you set up the web app (next step), you will need to go to the Web tab, scroll down to the Static files section, and add an entry:
| URL | Directory |
|---|---|
/static/ | /home/yourusername/my_project/static |
This tells PythonAnywhere’s server to route any request for /static/something.css directly to that folder, bypassing Django entirely.
Step 5: Create the Web App
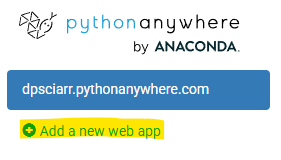
Go to the Web tab in the PythonAnywhere dashboard and click Add a new web app. (If you are on the free tier, you can only have one Web App at a time, so if you already have one you will need to modify the existing web app instead of creating a new one).
When prompted, choose Manual configuration (not the Django quickstart). The quickstart creates a brand new project for you, which is not what you want. Manual configuration lets you point to your existing project.
Select Python 3.9 as the Python version (this is in 2026 and the most recent Python version showing up for me is 3.9).
On the configuration page that appears, fill in the following fields:
| Field | Value |
|---|---|
| Source code | /home/yourusername/my_project |
| Working directory | /home/yourusername/my_project |
| Virtualenv | /home/yourusername/.virtualenvs/my_project_env |
Step 6: Configure the WSGI File
What WSGI is
WSGI stands for Web Server Gateway Interface. It is a standard that defines how a Python application talks to a web server.
When someone visits your site, PythonAnywhere’s web server (nginx) receives the HTTP request. But nginx does not know how to run a Python application. WSGI is the bridge between them: it defines a standard way for the web server to call into your Python code and get a response back.
Every Django project includes a wsgi.py file that exposes the Django application through this interface. PythonAnywhere needs to know where that file is and how to load it.
Editing the WSGI file
On the Web tab, you will see a link to a WSGI configuration file with a path like:
/var/www/yourusername_pythonanywhere_com_wsgi.py
Code language: JavaScript (javascript)
Click that link to open it in the editor. Delete all the existing content and replace it with:
import os
import sys

path = '/home/yourusername/my_project'
if path not in sys.path:
    sys.path.insert(0, path)

os.environ['DJANGO_SETTINGS_MODULE'] = 'my_project.settings'

from django.core.wsgi import get_wsgi_application
application = get_wsgi_application()
Replace yourusername and my_project with your actual username and project folder name.
What this file does:
- Adds your project directory to Python’s path so it can find your code
- Tells Django which settings module to use
- Loads the Django WSGI application and exposes it as
application, which is what PythonAnywhere expects to call
Step 7: Update settings.py for Production
There are two settings you need to adjust before going live.
DEBUG
In development, DEBUG = True causes Django to show you detailed error pages with full tracebacks when something goes wrong. That is helpful locally, but dangerous in production because those error pages can expose sensitive information about your code and server environment.
Set it to False:
DEBUG = FalseALLOWED_HOSTS
Django has a security feature that rejects requests from domains not explicitly listed in ALLOWED_HOSTS. This prevents a specific class of attack called HTTP host header attacks.
Add your PythonAnywhere domain:
ALLOWED_HOSTS = ['yourusername.pythonanywhere.com']You can edit settings.py directly in PythonAnywhere’s file editor or in the Bash console using nano:
nano ~/my_project/my_project/settings.pyStep 8: Reload and Test
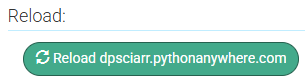
Go back to the Web tab and click the large green Reload button. This restarts your web app with all the configuration changes applied.
Visit your live site at:
https://yourusername.pythonanywhere.com
Code language: JavaScript (javascript)
If something is not working, the first place to look is the error logs. On the Web tab, you will see links to an Error log and a Server log. The error log will usually show you the exact Python traceback for whatever went wrong.
Common Issues and Fixes
500 Internal Server Error right after deployment Check the error log. The most common causes are a misconfigured WSGI file, a wrong DJANGO_SETTINGS_MODULE value, or a missing package in the virtual environment.
Static files (CSS/JS) not loading Make sure you ran collectstatic, and double-check that the static files URL and directory mapping on the Web tab matches what you have in STATIC_ROOT in settings.py.
no such table database errors You have models that have no migration files yet. Run makemigrations for those apps, then migrate, then reload the web app.
DisallowedHost error Your ALLOWED_HOSTS setting does not include your PythonAnywhere domain. Add it and reload.
A Note on the Free Tier
PythonAnywhere’s free Beginner account does not expire, but hosted web apps will be disabled after 3 months of inactivity. You will receive an email reminder, and re-enabling the app takes one click on the Web tab.

The free tier also restricts outbound internet access from your app to a whitelist of approved domains, which does not affect most simple Django projects that only talk to a local SQLite database.
Summary
The full deployment checklist in order:
- Upload and unzip your project
- Create a virtual environment and install dependencies
- Run
makemigrationsfor any custom apps, thenmigrate - Run
collectstatic - Create the web app using Manual configuration
- Set the source code, working directory, and virtualenv paths
- Edit the WSGI file to point to your project
- Set
DEBUG = Falseand updateALLOWED_HOSTSin settings.py - Add the static files mapping on the Web tab
- Reload and test